

Our $15 Blogger templates are a great way to get a stylish blog look in less than a few minutes. One of the customizations included with our blog templates is a styled profile area. Styled means that we code the default Blogger profile gadget so it looks more custom and pretty.
We’ve been getting a lot of questions lately from our $15 template clients about how to configure the about me gadget, so we thought we’d explain how to configure the profile gadget in a tutorial today.
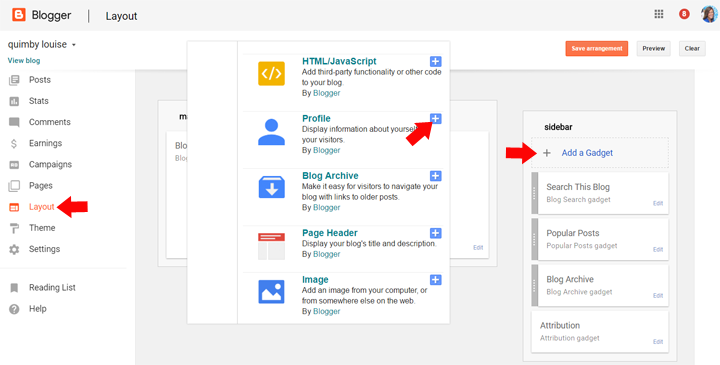
Step 1: Add Profile Gadget
First, you need to add the profile gadget to your sidebar. You do this by going to Layout and then clicking Add a Gadget. Then scroll down until you find the Profile gadget. Click the + to add.
RELATED POST: How to Add Gadgets to a Blogger Sidebar
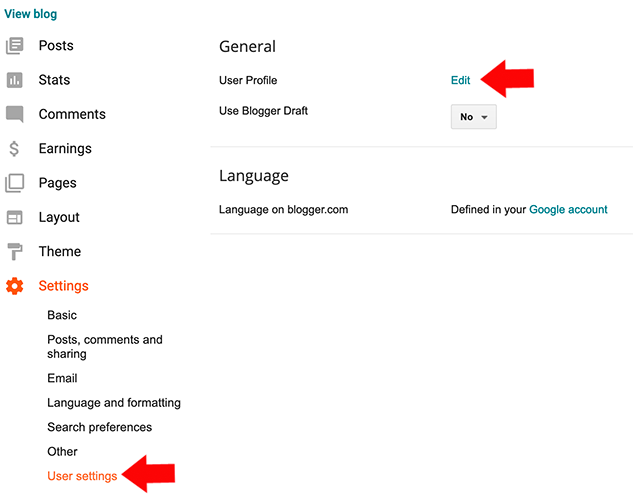
Step 2: Add about photo and text
To add your profile photo and bio info, go to Settings > User Settings > User Profile > Edit. The page that opens will show an overview of your profile.
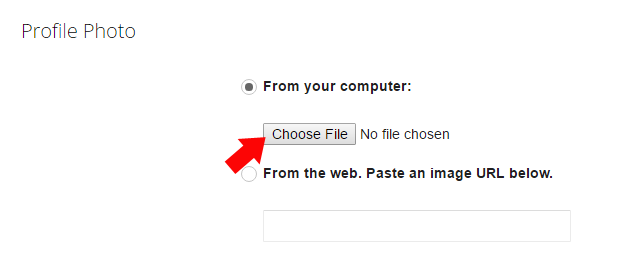
To change/add your profile photo, scroll down to the Profile Photo section. This will allow you to upload a photo from your computer or you can insert the url to your image if hosted somewhere on the web. If you are not currently using a photo, click the Choose File button. If you are currently using a photo and want to change it, click the Remove image button and then click the Choose File button to find your new photo.
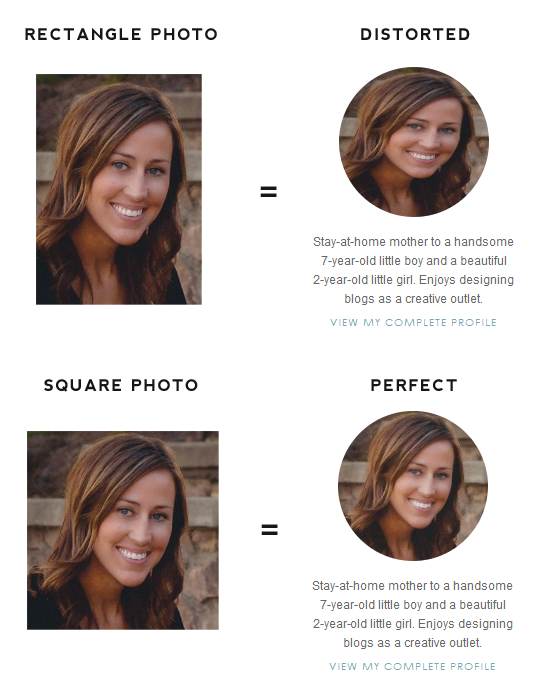
IMPORTANT: Make sure the image you upload has been cropped to a perfect square or it will appear distorted. We recommend making sure your photo is at least 500 x 500px.
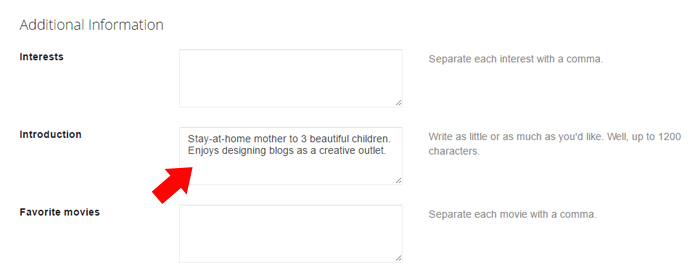
To add the text that will appear under your profile photo, scroll down to the Additional Information section and edit the Introduction area.
Save Settings button to save your settings. Then view your live blog to see your beautiful new styled profile area!
Troubleshooting
1. Blogger Profile is not showing after following all of these steps.
2. You’ve followed all of the steps and your photo is blurry.
All of our current Blogger templates have coding that will prevent blurry profile photos, but if you have an older template installed, Blogger may resize your profile photo automatically to 80×80 pixels. It then blows the picture up and pixelates it. There is a fix. Go to Template > Edit Html. Click your cursor anywhere in the code box and hit Ctrl/Command + F to open a search box. Search for this:
</body>
Now paste the following code directly BEFORE that closing </body> tag:
<script type="text/javascript">

var img = document.getElementsByClassName("profile-img");

img[0].setAttribute("src", img[0].getAttribute("src").replace(/s\B\d{2,4}/,'s' + '256-c'));

</script>
Hit “Save template” and the blurriness should be fixed. If not, let us know!
[“source=designerblogs”]


